Thursday 18 December 2014

JQuery Autocomplete Box in java Dynamic web application using MySQL

          This post is going to demonstrate how to implement auto complete box in a dynamic web project in java .To implement auto complete text box  in this web application i have used Java,Servlets,MySQl database,JSON and last but very important Jquery.At first have a glance at the directory structure in your Dynamic web application of eclipse.

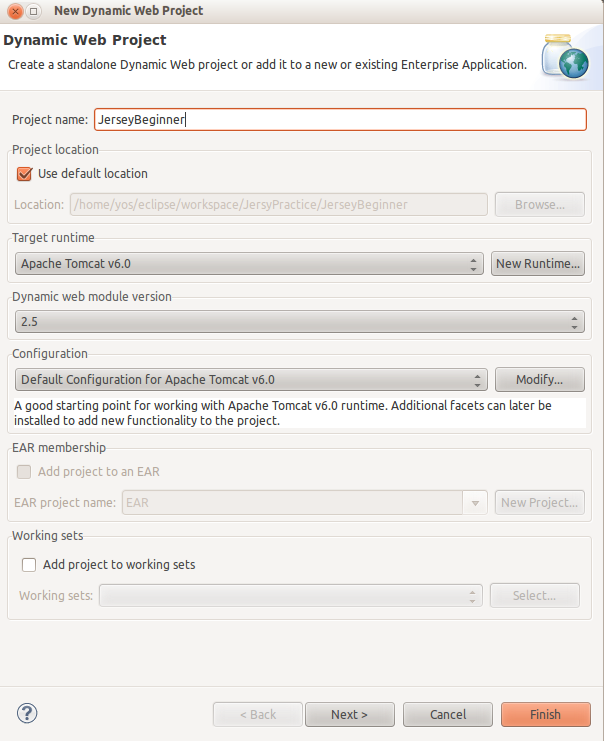
1)Directory Structure.


2)Download project from this link Download.And import the project into your Eclipse
3)Now lets start with Database here.Create a java class under com.DataSource.mysql package in your project.The code looks like this.
package com.DataSource.mysql;

import java.sql.DriverManager;
import java.sql.SQLException;

import com.mysql.jdbc.Connection;

public class DataSource {
 private static DataSource ds=null;
 private static final String JDBC_DRIVER = "com.mysql.jdbc.Driver";  
         //Change the database name,username,password as per your database design 
 private static final String DB_URL = "jdbc:mysql://localhost/naveen";
 private static final String USER = "root";
 private static final String PASS = "root";
 private DataSource(){
  
 }
    public static DataSource getInstace(){
     if(ds==null){
      ds=new DataSource();
     }
     return ds;
    }
    public static Connection getConnection(){
     Connection conn = null;
        try{
           Class.forName("com.mysql.jdbc.Driver");
           System.out.println("Connecting to database...");
           conn = (Connection) DriverManager.getConnection(DB_URL,USER,PASS);
        }catch(Exception e){
         try {
    conn.close();
   } catch (SQLException e1) {
    e1.printStackTrace();
   }
         e.printStackTrace();
        }
    return conn;
    }
}
4)Now create a Servlet AutoComplete.java
package com.autocomplete.sample;

import java.io.IOException;
import java.sql.Connection;
import java.sql.ResultSet;
import java.sql.Statement;
import java.util.ArrayList;

import javax.servlet.ServletException;
import javax.servlet.annotation.WebServlet;
import javax.servlet.http.HttpServlet;
import javax.servlet.http.HttpServletRequest;
import javax.servlet.http.HttpServletResponse;

import org.json.JSONArray;

import com.DataSource.mysql.DataSource;

/**
 * Servlet implementation class AutoComplete
 */

public class AutoComplete extends HttpServlet {
 private static final long serialVersionUID = 1L;

    public AutoComplete() {
        super();

    }
 protected void doPost(HttpServletRequest request, HttpServletResponse response) throws ServletException, IOException {
  ArrayList al=new ArrayList();
  try{
  DataSource ds=DataSource.getInstace();
      Connection conn=ds.getConnection();
      Statement stmt=conn.createStatement();
      String sql="select name from customers";
      ResultSet rs = stmt.executeQuery(sql);
      while(rs.next()){
       al.add(rs.getString("name"));
      }
      rs.close();
      stmt.close();
      conn.close();
  }catch(Exception e){
   e.printStackTrace();
  }
   JSONArray json=new JSONArray(al);
   response.setContentType("application/json");
         response.getWriter().print(json);
 }   
}
5)Now configure your web.xml file as below.

  AutoCompleteBox
  
    home.jsp
  
  
    Auto
    com.autocomplete.sample.AutoComplete
  
  
     Auto
     /Auto
  

6)Now create a home.jsp page under WebContent folder


  Autocomplete Example


7)Drop the dependency jars under WEB-INF/lib folder .Here I have created a tables customers under my schema and retrieving all the names and sending it to jsp as Json object.So you can design your own tables and databases and change the query in the statement in above mentioned class and use it .If you had anny issues in executing this or any exceptions that are interrupting you please let me know here in comment box below.
8)And the output of the application looks like this
Thank you Have a nice day

Monday 21 July 2014

how to run a dynamic web project in eclipse using weblogic

Hello Viewers


This post is regarding how to configure web logic server for dynamic web project in your eclipse I D E .Below Given are the steps to configure Web logic server for dynamic web project..

Steps:
1)In eclipse go to windows->show view->Other and type servers and click on it you should be able to find servers tab in the eclipse show view.


2)Click on new server wizard link .You will find list of servers available for configuration,Check for web-logic

3)If web logic was not foundClick "download additional server adapters" hyperlinkand downloadWeb Logic adapters from Oracle(Oracle cloud tools and oracle web-logic tools).

4) Now your eclipse is ready with web-logic server adapters.

Configuring Web-logic to dynamic web project:
1)Go to start menu go to web logic server configuration wizard.Follow the steps click on Next ->
button and create a domain with some desired name say some DummyDomain give Web-logic credentials and port number in the web-logic wizard

2) Now configure web-logic server .Follow the steps like click on new server wizard in servers tab as shown in Image 3.
select the web-logic adapter that matches your server version.Browse web logic home and web-logic domain that which you had created before


and click finish to finish the server configuration

3) Create a dynamic web project now


4)And create a index.jsp file under the dynamic project and click run as ->Run on server
Web logic starts fine and opens index.jsp as welcome file in browser

Some Issues that may interrupt:
An internal error occurred during: "Publishing to Oracle WebLogic Server
              Could not initialize class oracle.eclipse.tools.weblogic.facets.WlsGarFacet          
If this interrupts your execution Go to Eclipse->Market place-> and search for Oracle Coherence Tools and install it and re run the dynamic web project .This helps in solving the above mentioned issue

Tuesday 24 June 2014

JAX-RS Jersey Hello World beginner example -Java web services

A Simple Hello World example to know the basic jersey -RS web service

Steps:

1)Open eclipse and create a Dynamic web project with some project
name of your  choice


2) Download jersey -RS 2.0 jars from this link https://jersey.java.net/download.html
3) Go to WebContent/WEB-INF/lib folder under your project and drop all jars present under jersey folder into lib directory
4)Add the jars to the build path and add java-json.jar along with other jars to buildpath
5) Now configure web.xml (deployment descriptor) under WEB-INF as follows

  JerseyBeginner
  

    index.jsp


    HelloWorld
    org.glassfish.jersey.servlet.ServletContainer
    
      jersey.config.server.provider.packages
      com.practice.jersey


    HelloWorld
    /rest/*
  

Now create a package under src folder as com.practice.jersey(As given in <param-value> tags in web.xml
Create a class HelloWorld under package com.practice.jersey
Place code below in HelloWorld.java
   package com.practice.jersey;

import javax.ws.rs.GET;
import javax.ws.rs.Path;
import javax.ws.rs.PathParam;
import javax.ws.rs.Produces;
import javax.ws.rs.core.MediaType;
import javax.ws.rs.core.Response;

import org.json.JSONException;
import org.json.JSONObject;

@Path("/hello")
public class HelloWorld {
 @GET
 @Produces(MediaType.TEXT_PLAIN)
 public String sayHello(){
  return "hello World";
 }
   
 @Path("/{name}")
 @GET
 @Produces(MediaType.TEXT_XML)
 public String toXmlHello(@PathParam("name") String name){
  return "Hello "+name+"";
 }
 
 @Path("/{name}/json")
 @GET
 @Produces(MediaType.APPLICATION_JSON)

 public Response toJsonHello(@PathParam("name") String name) throws JSONException{
  JSONObject sample=new JSONObject();  
   sample.accumulate("name", "Hello"+name);  
  return Response.status(Response.Status.ACCEPTED).entity(sample.toString()).build();
 }
}

Now run the project on server open the browser and type the Ur L's as below
1)http://localhost:8080/JerseyBeginner/rest/hello
2)http://localhost:8080/JerseyHelloWorld/rest/hello/javasimplestuff
3)http://localhost:8080/JerseyHelloWorld/rest/hello/javasimplestuff/json

output 1:   First URL calls sayHello() in HelloWorld
output2:  Second URL calls toXmlHello() in HelloWorld @Pathparam  takes the value passed from URL @Path indicates the URL pattern to call for that particular rest resouce
           
output3: Third URL calls toJsonHello()  in HelloWorld it takes path param and construct Json and returns the response
               

Wednesday 7 May 2014

Sort Integer array without using sort() method -Java

Hi Viewers


        This post is regarding a small code snippet which helps us to sort an integer array of elements   without using any of the sort() method present in Arrays or Collections in Java API.We used bubble       sort  technique to sort the integer array.This is being asked frequently in written exams of interviewing process.Hope this code snippet helps you 


Code Begins here:


public class SortIntArray {

 public static void main(String[] args) {
  int[] a={12,4,1,7,10,21,21,18,17,15,5,34,30};
  SortIntArray sia=new SortIntArray();
  int[] des=sia.toDescendingOrder(a);
  int[] asc=sia.toAsscendingOrder(a);
  System.out.println(">>>>>>>>>>>descending order>>>");
  for(int i=0;i<des.length;i++){
   System.out.print(des[i]+"\t");
  }
  System.out.println("");
  System.out.println(">>>>>>>asscending order>>>>>>");
  for(int i=0;i<asc.length;i++){
   System.out.print(asc[i]+"\t");
  }
 }
  public int[] toDescendingOrder(int[] a){
   int[] b=toAsscendingOrder(a);
   int c[]=new int[b.length];
   int j=0;
   for(int i=b.length-1;i>=0;i--){
    c[j]=b[i];
    j++;
   }
 return c;
  }
  public int[] toAsscendingOrder(int[] a){
  int swap;
  for(int i=0;i<a.length-1;i++){
   for(int j=0;j<a.length-1-i;j++){
    if(a[j]>a[j+1]){
     swap=a[j];
     a[j]=a[j+1];
     a[j+1]=swap;
    }
   } 
  }
   return a;
  }
}
output: >>>>>>>>>>>descending order>>>
        34 30 21 21 18 17 15 12 10 7 5 4 1 
        >>>>>>>asscending order>>>>>>
        1 4 5 7 10 12 15 17 18 21 21 30 34

Wednesday 9 April 2014

Mongodb Import and Export database -MONGODB


This post is regarding how to import and export mongodb data dump. 
To export the database we need to run  mongodump.exe.
To import the database dump we need to run mongorestore.exe.
Consider and example Customer database need to be exported and imported


WINDOWS:

Export Dump:
step 1: Make sure that mongodb is running in your machine if its not running
go to mongodb\bin folder in your mongodb installation and run mongod.exe file
step 2: Run mongodump.exe file which will export all schema present in db to data folder
inside bin directory of mongodb installation

Step 3: If you want to export a particular schema of your db to a desired location in your machine
then press windows+r type cmd and thenEnter button your command prompt will be opened Go to mongo installation bin directory

Command : mongodump.exe -d customer --out C:\

This will export database customer to C:\ in your machine

    Restore Dump:
command:mongorestore.exe -d customer C:\\customer
This will import database customer to mongodb

UBUNTU :
Export Dump:
step 1: Make sure that mongodb is running in your machine if its not running
run command sudo service mongodb startand the run the below command to
export the dump
Command :mongodump -d customer --out /home

This will export database customer to /home in your machine

Restore Dump:
command:mongorestore -d customer /home/customer
This will import database customer to mongodb


Thanks and regards

javasimplestuff

Tuesday 25 March 2014

Write data to Excel using Apache POI -Java

HI

This post is regarding writing data to a xlsx sheet.In java we had many powerful API's to write data to CSV or xlsx or xls files.One such API is apache POI by apache foundation.This API has classes and interfaces which helps us to write data to .csv or .xlsx sheets.

Here I am providing you a sample code snippet which helps you to explore and experiment more on this

ENVIRONMENT: java 1.6 sdk,apche poi  jars

Download location : http://poi.apache.org/download.html

Setup your environment add jars to the build path in eclipse.

Code begins:


 import java.io.FileOutputStream;

import org.apache.poi.ss.usermodel.Cell;
import org.apache.poi.ss.usermodel.Row;
import org.apache.poi.ss.usermodel.Sheet;
import org.apache.poi.ss.usermodel.Workbook;
import org.apache.poi.xssf.usermodel.XSSFWorkbook;

public class sample {

 public static void main(String[] args) {
   try {
  String sample="test content";
  Workbook wb=new XSSFWorkbook();
  Sheet sheet=wb.createSheet("samplesheet");
  Row row=sheet.createRow(0);
  Cell cell=row.createCell(0);
  row.getCell(0).setCellValue(sample);
  FileOutputStream fop=new FileOutputStream("sample.xlsx",true);
  wb.write(fop);
  fop.flush();
  fop.close();
  } catch (Exception e) {
  
   e.printStackTrace();
  }

 }

}   

Output: This sample created a Excel sheet with first cell filled with the string test content

Friday 21 March 2014

Grails with Mysql database DataSource.groovy configuration

Hello viewers

In this post i am going to give a sample of code snippet which helps to configure Grails with mysql database. First of all grails is a framework which is developed by integrating hibernate and spring framework by springsouce .In a grails-app to communicate with database we provide all our configuration in DataSource.groovy file present under grails-app/conf folder in a grails project


dataSource {
    pooled = true
    dbCreate = "update"
    url = "jdbc:mysql://localhost:3306/yourDb"
    driverClassName = "com.mysql.jdbc.Driver"
    username = "root"
    password = "xxxx"
}
hibernate {
    cache.use_second_level_cache = true
    cache.use_query_cache = false
    cache.region.factory_class = 'net.sf.ehcache.hibernate.EhCacheRegionFactory'
}
// environment specific settings
environments {
    development {
        dataSource {
            pooled = true
            dbCreate = "update"
            url = "jdbc:mysql://localhost:3306/yourDb"
            driverClassName = "com.mysql.jdbc.Driver"
            username = "root"
            password = "xxxx"
        }
    }

and in grails we had plugins which will handle many operations.here to connect to mysql we need connector jar which in java we download and include it in our build path.But in grails right click on project in any of your IDE (Here i am using intellij idea) and in options choose grails-->plugins and search for mysql .Now install all mysql dependent plugins

then it get reflected in application.properties in your project as
plugins.mysql-connectorj=5.1.22.1

Here ends the configuration now you access mysql with your grails app


Thanks and regards
venkata naveen

Wednesday 5 March 2014

Run a Java Thread For Certain period of time java

A sample program on threads to demonstrate how to start a thread and run it for a specified period of time (say 2 minutes in this below example).

Code begins here.........


import java.util.Calendar;
class ThreatRunner extends Thread{
 @Override
 public void run() {
  System.out.println(" in the thread");
  try {
   sleep(10000);
  } catch (InterruptedException e) {

   e.printStackTrace();
  }
 }
}
public class ThreadWithTimer {
 public static void main(String[] args) {
  ThreatRunner tr=new ThreatRunner();
  Thread tt=new Thread(tr);
  Calendar mycal=Calendar.getInstance();
  long currentTimer=System.currentTimeMillis();
  System.out.println(mycal.getTime());
  while ((System.currentTimeMillis()-currentTimer)< 2*60*1000){
   tt.run();

  }
  System.out.println(mycal.getTime());

 }

}
Output: Thu Mar 06 12:17:04 IST 2014
in the thread
in the thread
Thu Mar 06 12:19:04 IST 2014

Thursday 30 January 2014

Avoid cloning Singleton object -Java

HI Viewers
 Here i'm going to give a short note one how to avoid a singleton object from getting cloned.This is one of the interview questions that are being asked frequently while interviewing .We all know that singleton pattern is which doesn't allow for invoking new keyword while creating new instance to that class.generally we achieve it in many ways that i will explain in Singleton design pattern .Here I'm giving you a small code snippet which doesn't allow Singletons instance from getting cloned.

Create a class Singleton and override the Object class clone method and return CloneNotSupported instance to that method
public class Singleton implements Cloneable{
 private static Singleton ss=new Singleton();
 
 private  Singleton() {

 }

 public static Singleton getInstance(){
  return ss;
 }
  public Object clone(){
   
  return new CloneNotSupportedException();
   
  }

}
Now create a sample class to check the Singleton class clone mechanism
public class Example {
public static void main(String args[]){
 
 Singleton ss=(Singleton) Singleton.getInstance().clone();
}
}
Out put: Exception in thread "main" java.lang.ClassCastException: java.lang.CloneNotSupportedException cannot be cast to Singleton

Tuesday 21 January 2014

UBUNTU-System Stuck in Login Loop

Hi Ubuntu users,you might some times face these problem like when you try to log in with proper credentials it will get logged in immediately a black screen appears. Weird thing without even you see the content on the black screen your machine again show you log in screen.And the process repeats and make you vexed.Here is the solution which i found and made may machine work .


Step 1: Press ctrl+alt+F3 in your machine .you will get shell screen log in to it .

Step2 : Run ls-lah command in the shell .Check for .Xauthority in the output shown.If the output is like
           -rw------- 1 root root 53 Jan 21 10:19 .Xauthority


Step 3: Do  sudo chown username:username .Xauthority and try logging in .It worked for me and               try  this yourselves if you got stuck in the similar way


Thanks and Regards
JavasimpleStuff